

How To Backup Computer Data Windows 10
Creating frequent backups is 1 of the best strategies to protect your documents, pictures, videos, custom configurations, and Windows 10 files against software problems, hardware failure, hackers, and malware (such equally viruses and ransomware) attacks.
Although there are many third-political party utilities that you can use, Windows 10 ships with the legacy "Backup and Restore" experience, which allows you to create full backups automatically at regular intervals.
A full backup using this tool means that Windows 10 will make a copy of everything on your computer, including installation files, settings, apps, and all your files stored in the chief drive, as well as those files stored in different locations. Then when your device of a sudden stops working, a critical error prevents the device from starting correctly, or files get damaged, you tin can utilise the "Backup and Restore" feature to recover private files or the entire arrangement as necessary. Backing up should be an essential part of anybody'due south regular routine, whether you work in an role or work at domicile.
In this Windows 10 guide, we'll walk you through the steps to set total backups of your device automatically.
- How to configure automatic backups on Windows 10
- How to manage backup settings on Windows 10
- How to restore backup on Windows x
How to configure automatic backups on Windows ten
To configure automatic backups on Windows 10, utilise these steps:
Important: Backup and Restore is no longer a maintained feature on Windows 10. Yous can still apply it, but in the hereafter, it may stop working. Besides, equally a deprecated feature, Microsoft can decide to remove this tool in time to come releases completely.
- Open Settings.
- Click on Update & Security.
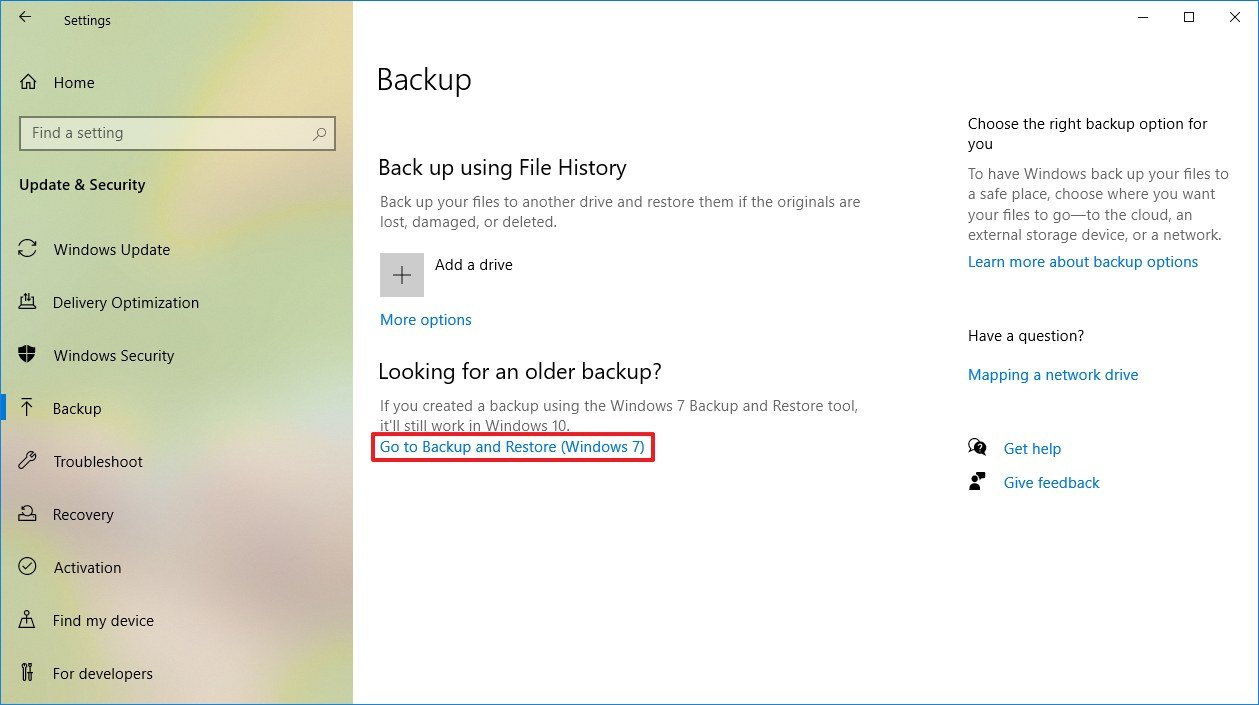
- Click on Fill-in.
- Under the "Looking for an older backup" department, click the Become to Backup and Restore option.
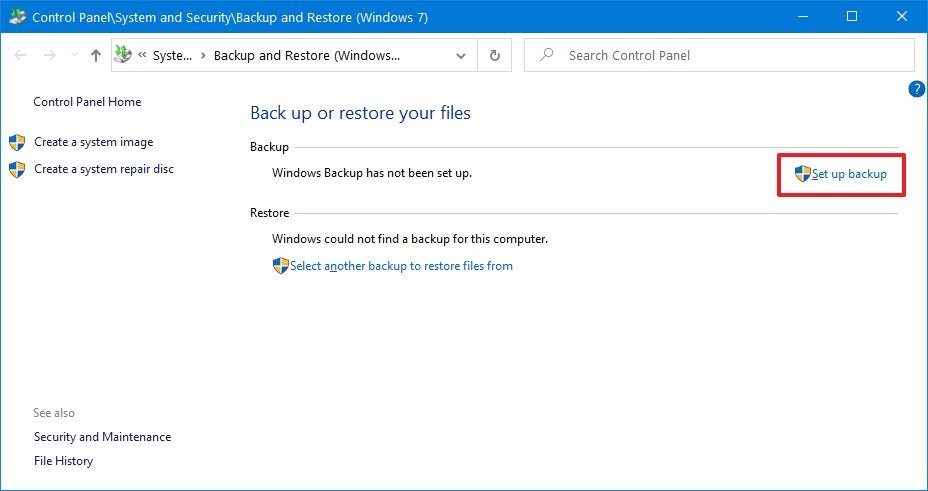
- Nether the "Backup" section, click the Gear up backup selection on the right.
- Select the removable drive to shop the automatic backups.
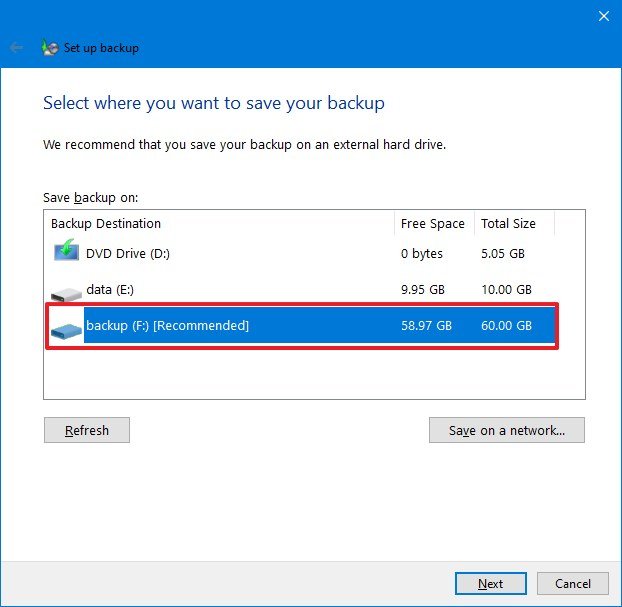
- Click the Next button.
- Under the "What do yous want to backup?" section, select the Let me choose option.Quick tip: You can select the Let Windows choose option, but if you want to make certain that everything you want is getting backed upwards, the Let me choose is the option that you want to select.

- Click the Next button.
- Under the "Data Files" department, cheque all the items as necessary.
- Under the "Computer" section, check the Local Deejay (C:). (If you have multiple drives, they will also appear in this list.)
- Check the Include a arrangement of drives: System Reserved, (C:) choice.
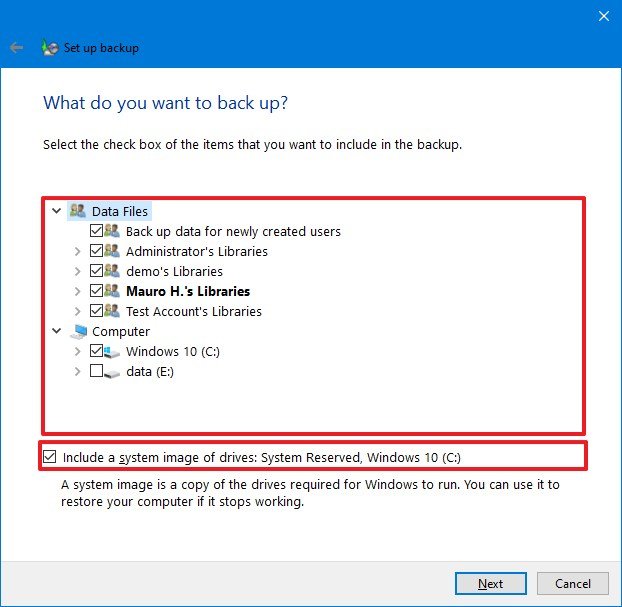
- Click the Next button.
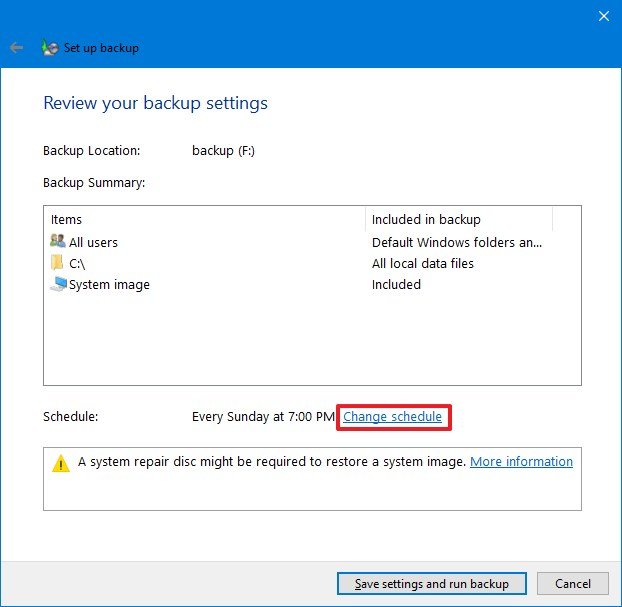
- Click the Modify schedule selection.
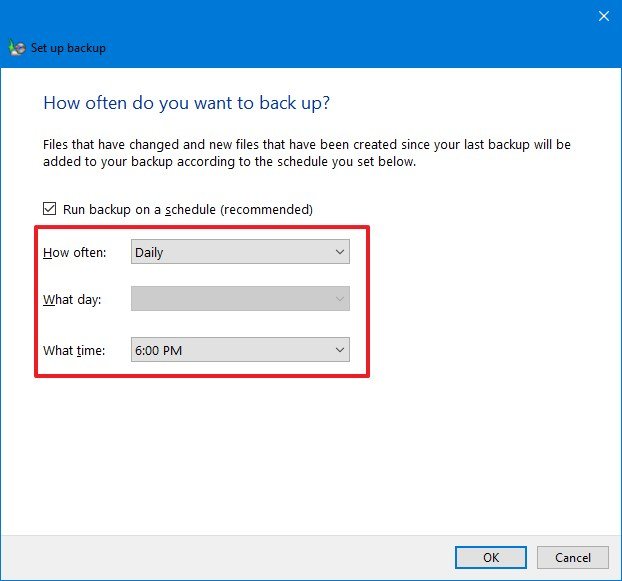
- Check the Run backup on a schedule option.
- Specify the frequency, date, and time when Windows x should backup your calculator.Quick tip: If y'all're working with essential information, such every bit work files, yous should consider bankroll up using the "Daily" pick.
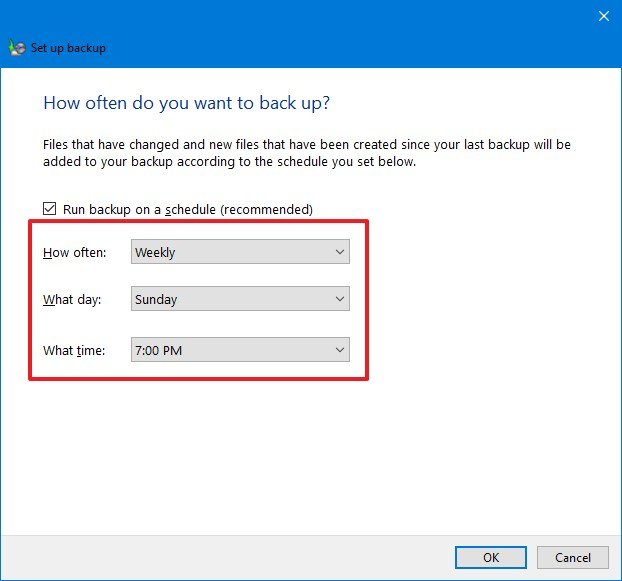
- Click the OK push.
- Click the Relieve settings and exit button.
One time yous complete the steps, an initial backup of your device volition be created, and then incremental backups volition be performed on the schedule you specified.
During the procedure, y'all can click the View details push button to see more than data about the files being copied and an option to interrupt the process (if necessary). Subsequently the backup is complete, in the "Backup" department, you'll exist able to view the current size of the backup and bulldoze location equally well as the engagement and time of the next and previous fill-in.
How to manage backup settings on Windows 10
After configuring the automatic fill-in feature on Windows 10, you tin manage many of the settings to foreclose running out of space in the fill-in bulldoze and changing the schedule to a different date and time.
Freeing up backup infinite
To free up space on the backup drive, use these steps:
- Open Settings.
- Click on Update & Security.
- Click on Backup.
- Under the "Looking for an older backup" section, click the Get to Backup and Restore option.
- Under the "Backup" section, click the Manage space option.
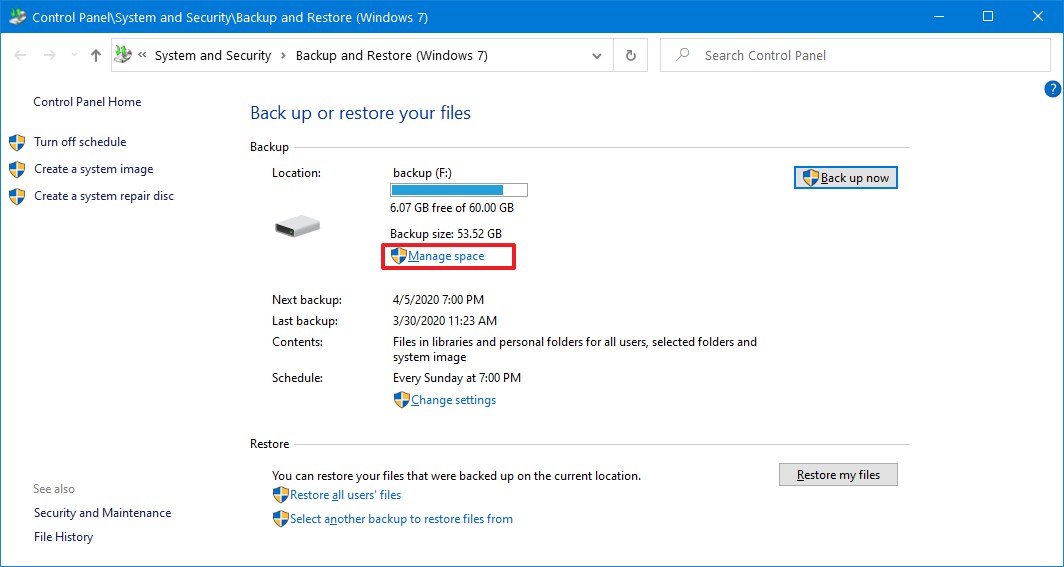
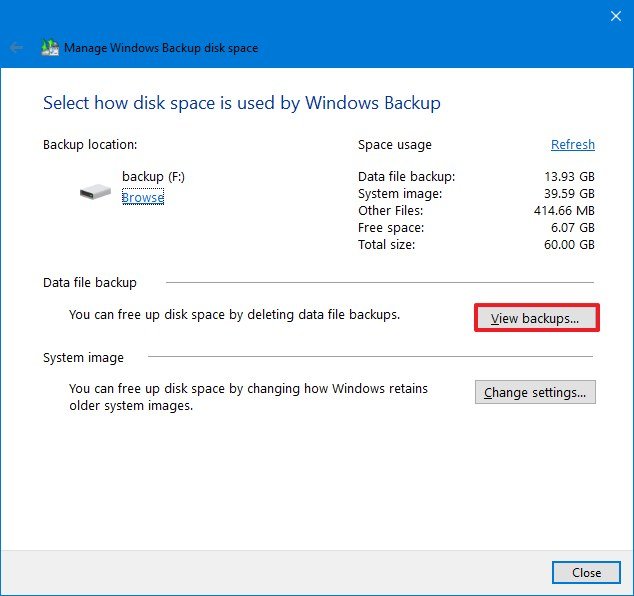
- Under the "Data file backup" department, click the View backups button.
- Select the oldest backup.
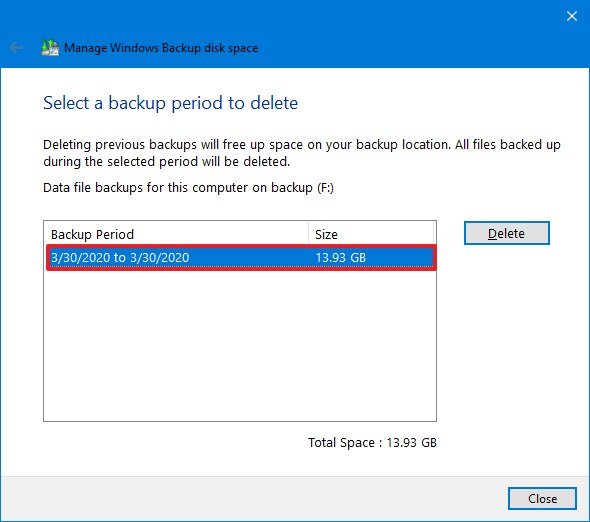
- Click the Delete button.
- Repeat steps No. 7 and 8 to delete boosted backups as necessary.
- Click the Close push.
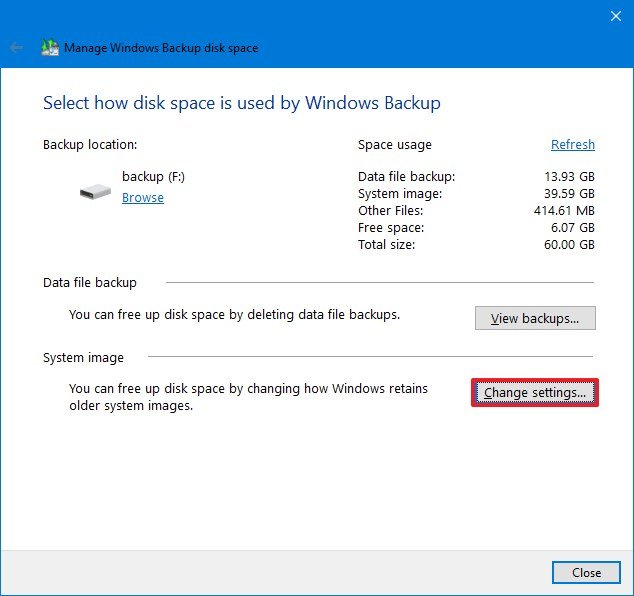
- Under the "System image" section, click the Change settings button.
- Select the Proceed but the latest arrangement image and minimize infinite used by fill-in pick.
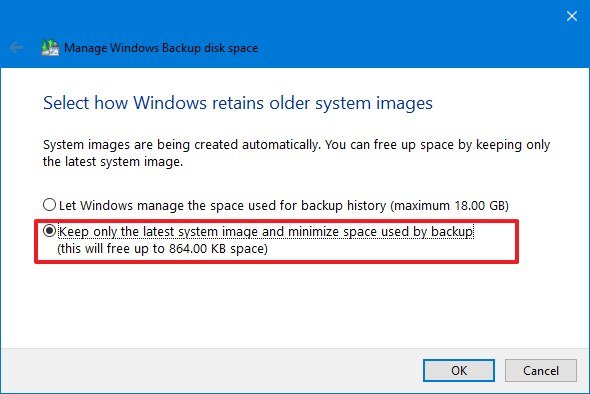
- Click the OK button.
- Click the Delete button.
- Click the Close push.
Subsequently you consummate the steps, the external bulldoze should have more than space to allocate futurity backups.
If you take a lot of information to protect and optimizing the fill-in bulldoze storage doesn't brand a divergence, you lot should consider getting a larger external storage. If you don't know which one to choice, check out our external hard drive guide to select the all-time option for y'all.
Changing fill-in schedule
To set a different schedule to run backups automatically on Windows ten, use these steps:
- Open Settings.
- Click on Update & Security.
- Click on Backup.
- Under the "Looking for an older fill-in" section, click the Go to Fill-in and Restore selection.
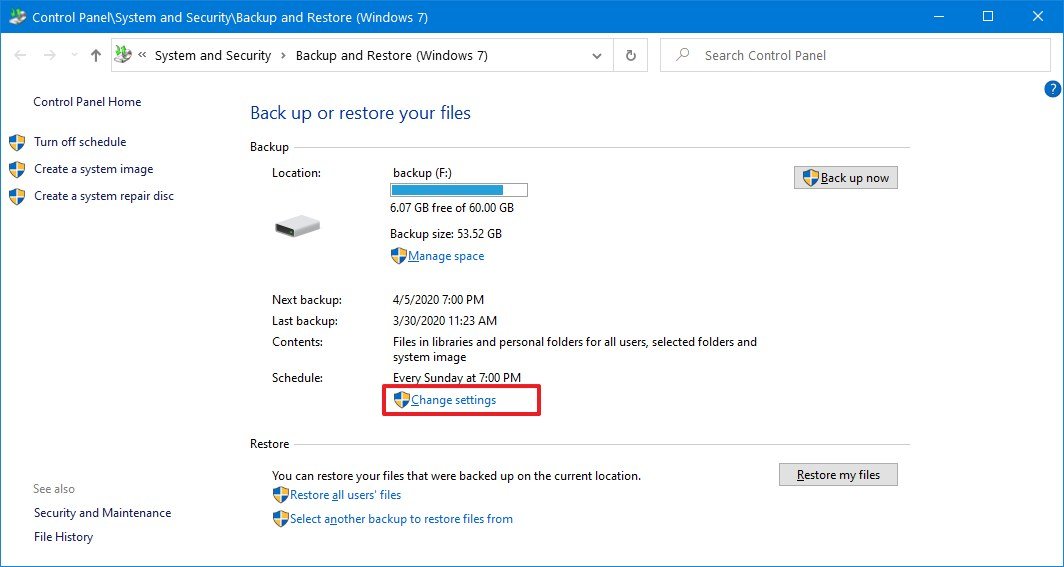
- Under the "Schedule" section, click the Change settings link.
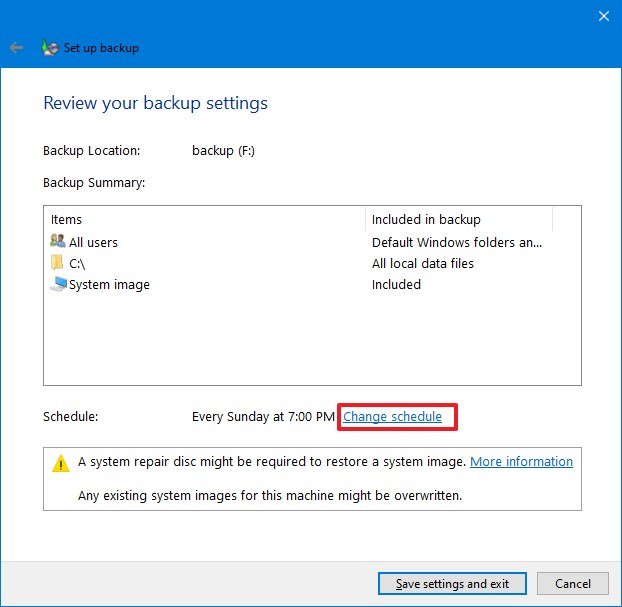
- Continue with the on-screen directions (without changing the settings) until y'all go far in the Review your fill-in settings page.
- Click the Modify schedule choice.
- Specify a new schedule for the backup.
- Click the OK button.
- Click the Salve settings and go out push button.
In one case you complete the steps, backups will run automatically during the new schedule that y'all specified.
When the time comes to restore your computer from fill-in, you'll need a bootable media. Although the tool includes an option to create a disc to boot your device to restore a backup, newer devices don't come with disc drives anymore.
If you don't have a disc drive, you'll need to apply the Media Creation Tool (opens in new tab) to create a USB bootable media, which you tin use to access the recovery surroundings when your computer doesn't boot.
In the instance that y'all notwithstanding take a disc drive, insert a writable bare disc, and use these steps:
- Open Settings.
- Click on Update & Security.
- Click on Backup.
- Nether the "Looking for an older backup" department, click the Get to Backup and Restore option.
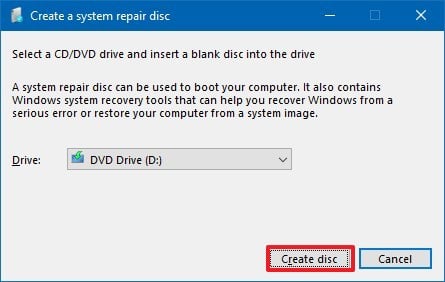
- Click the Create a arrangement repair disc option from the left pane.
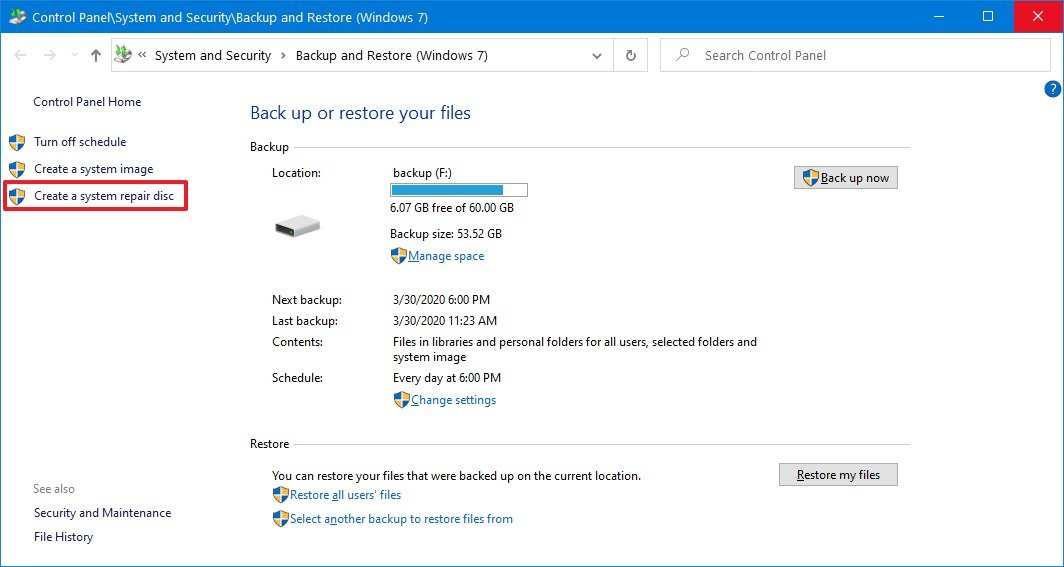
- Click the Create disc push button.
After you complete the steps, y'all tin can use the disc or USB bootable media to commencement your computer in the Advanced startup way to recover your files.
How to restore backup on Windows 10
When the unexpected happens, you can use the Backup and Restore feature to restore files individually or recover your entire system and data.
Restoring files using full fill-in
To restore one or multiple files, use these steps:
- Open Settings.
- Click on Update & Security.
- Click on Fill-in.
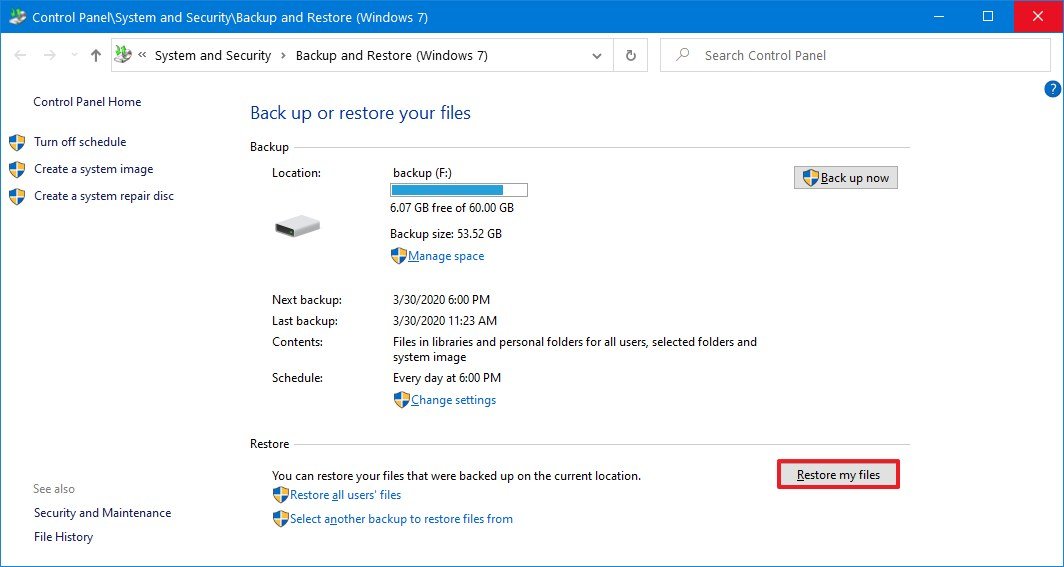
- Nether the "Looking for an older backup" section, click the Go to Backup and Restore option.
- Under the "Restore" section, click the Restore my files push.
- Click the Scan for files button.
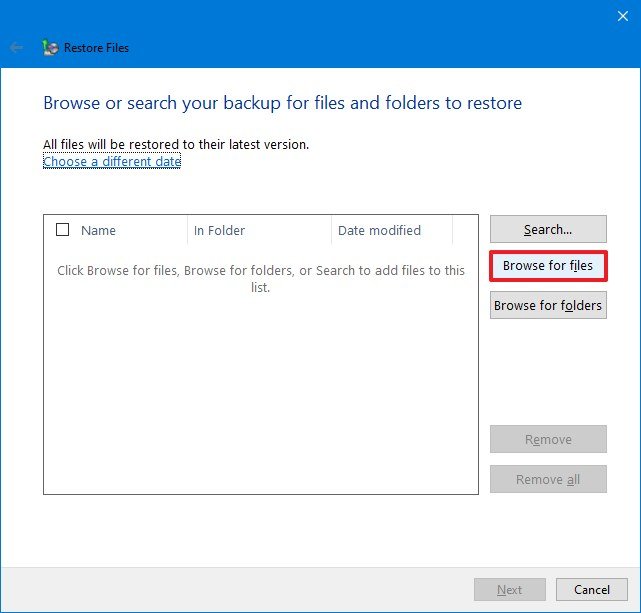
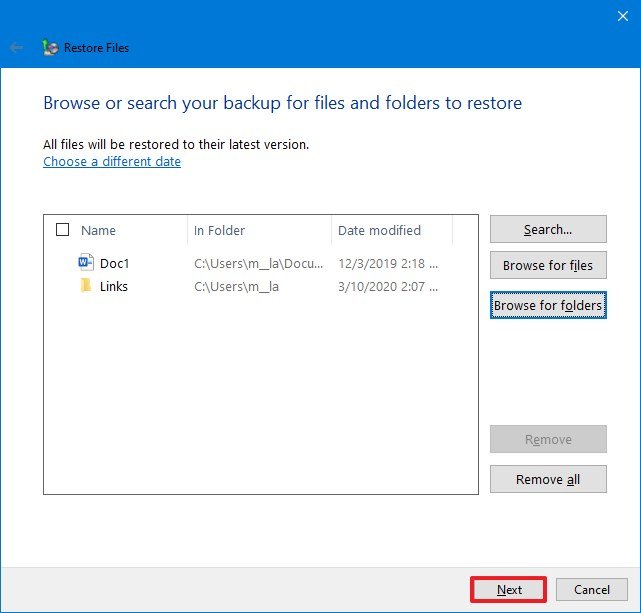
- Select the files that you want to restore.
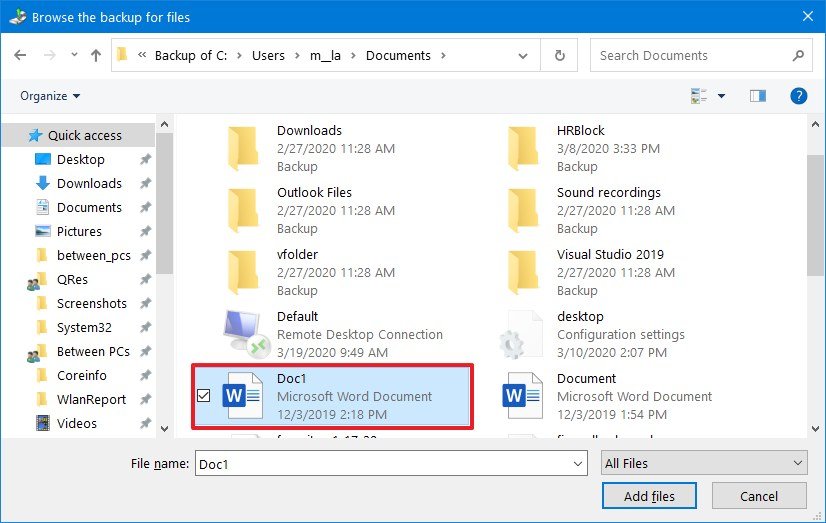
- Click the Add together files push button.
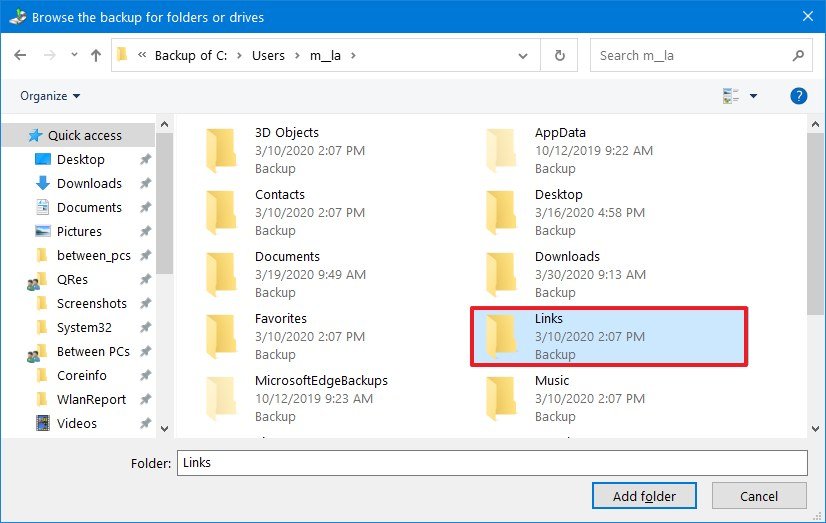
- Click the Browse for folders button.
- Select the folders that yous desire to restore.
- (Optional) If you lot don't know the location of the file, utilize the Search push button to find it.
- Click the Next button.
- Select the In the post-obit location option (recommended).
- Click the Browse push.
- Select the restore location.
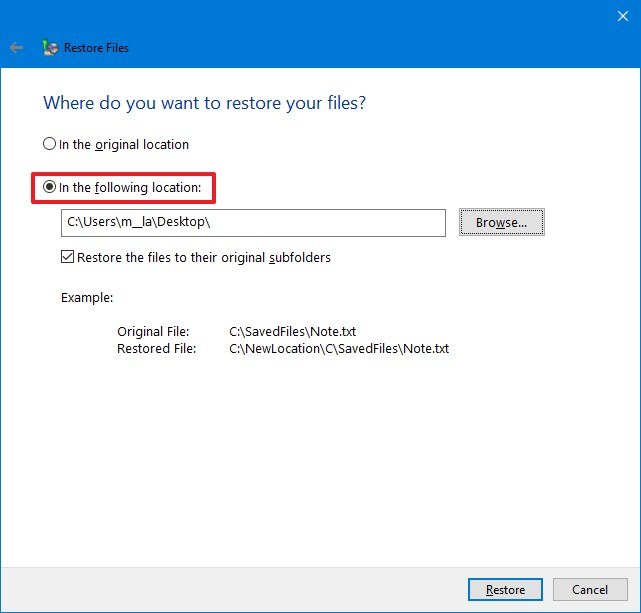
- Click the OK button.
- Click the Restore button.
- Click the Finish button.
One time you consummate the steps, you'll exist able to admission the files and folders from the location that you specified during the recovery procedure.
Restoring computer using full backup
If your computer doesn't kicking or you lot're replacing the difficult drive, you tin restore your device using the most recent backup. Yet, before y'all can proceed, you have to brand sure the estimator can start from USB (or CD-ROM drive), which means that you may need to modify the boot order inside the Basic Input/Output System (BIOS) or Unified Extensible Firmware Interface (UEFI) on your device.
Usually, the process involves pressing one of the function keys (F1, F2, F3, F10, or F12), the ESC, or Delete key as soon every bit the device starts. The only caveat is that the process is often different depending on the manufacturer and even the estimator model. So make sure to check your device manufacturer'due south back up website for more specific instructions.
While in the firmware interface, notice the "Kick" section, and configure the boot order to kickoff from the USB bootable drive (or CD-ROM drive), and salve the new changes.
To perform a system restore using a backup, utilise these steps:
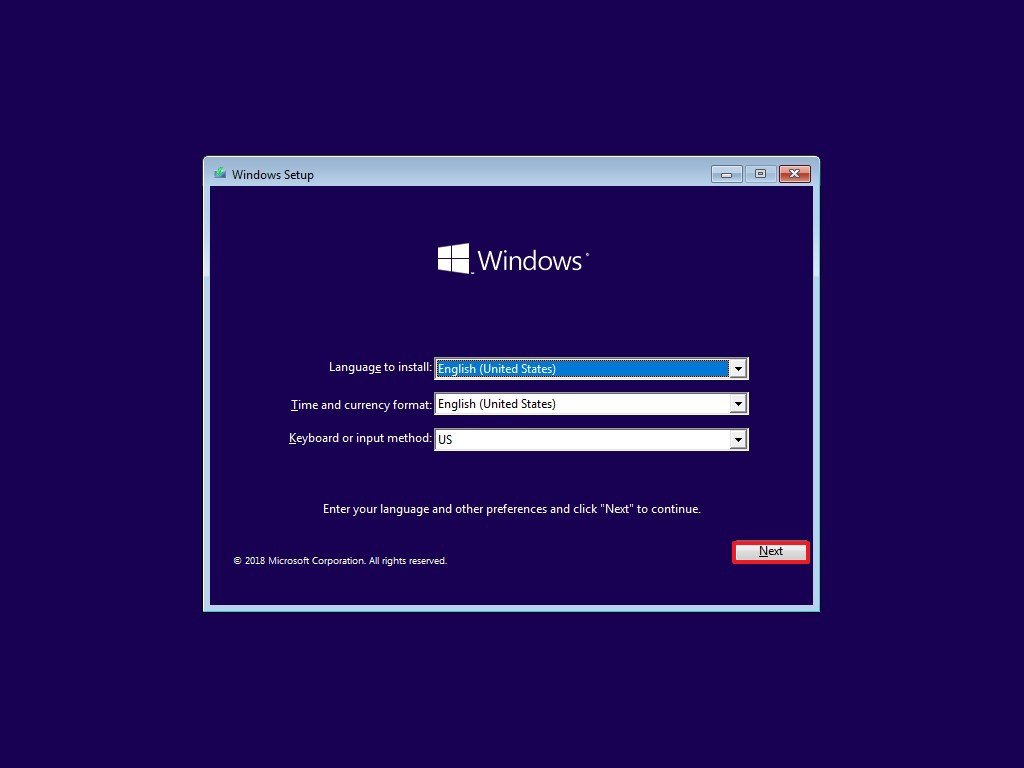
- Start the device with a bootable media drive.
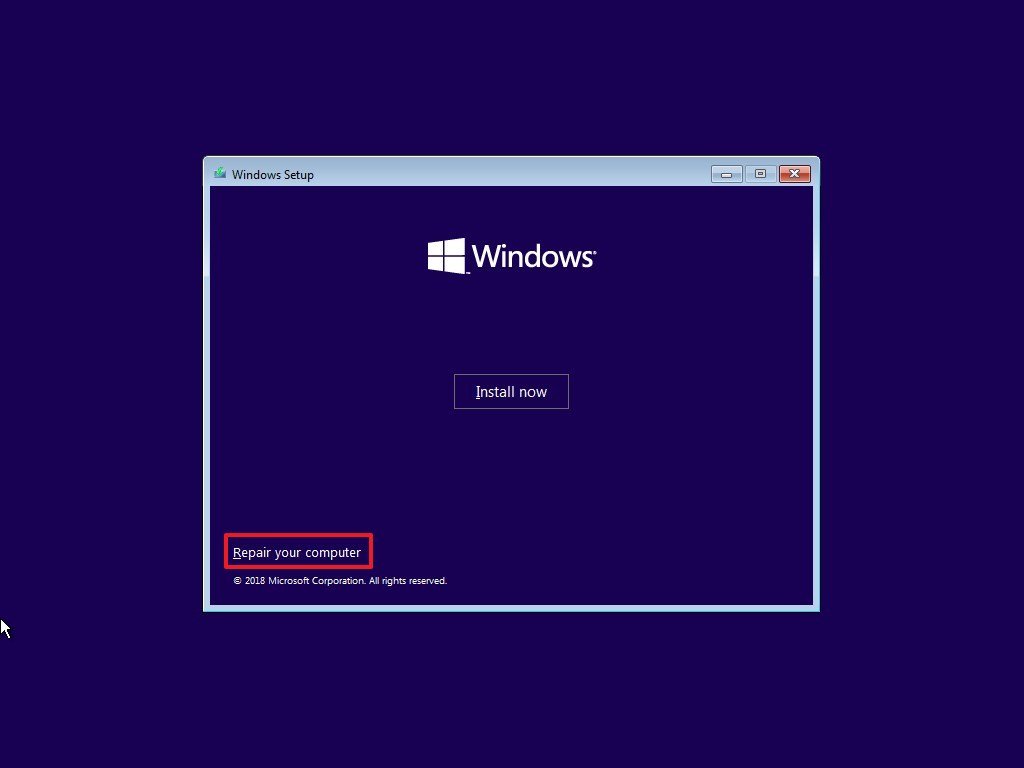
- On "Windows Setup," click the Next button.
- Click the Repair your calculator link at the bottom-left corner.
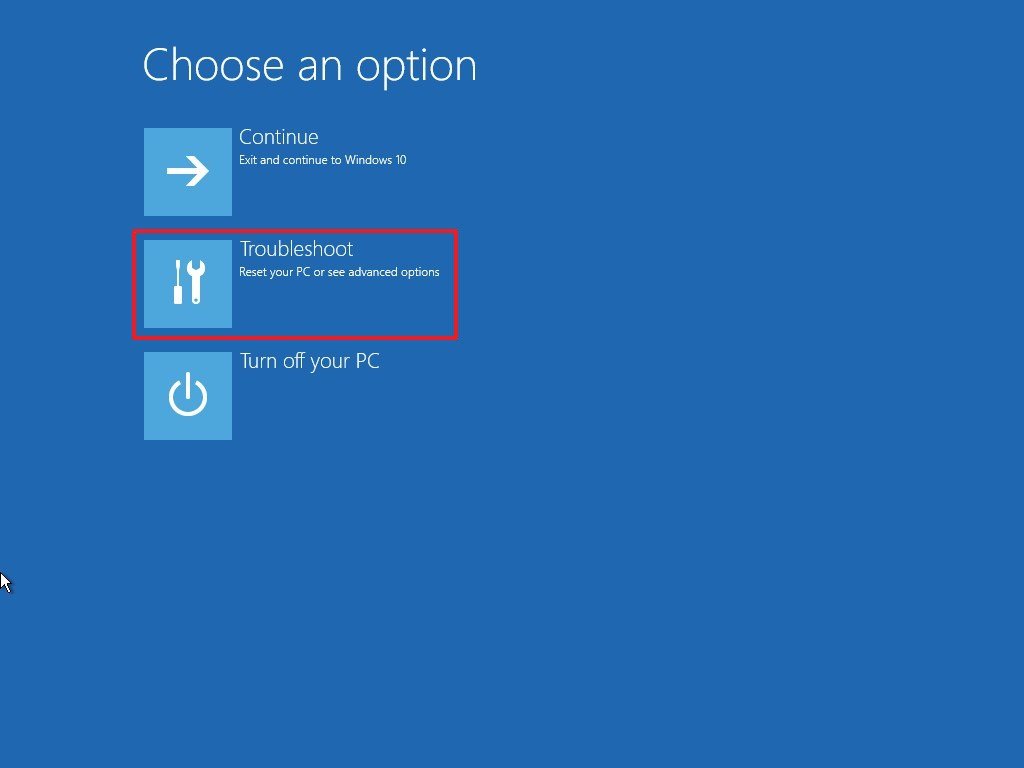
- Click the Troubleshoot selection.Quick tip: If you need to restore your device from backup, and you lot still have access to the desktop, you can access the Advanced startup settings from Settings > Update & Security > Recovery, and clicking the Restart at present button from the "Advanced startup" section.
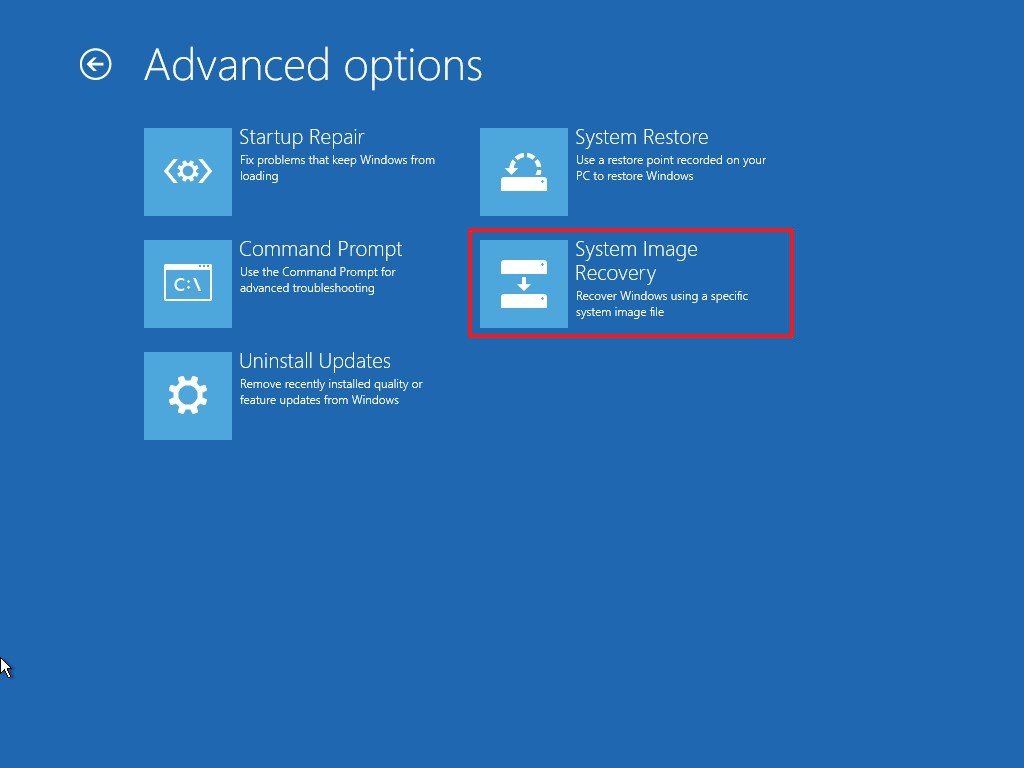
- Click the System Paradigm Recovery pick.
- Select the Windows 10 choice every bit the target.
- Select the Utilise the latest available system image option.
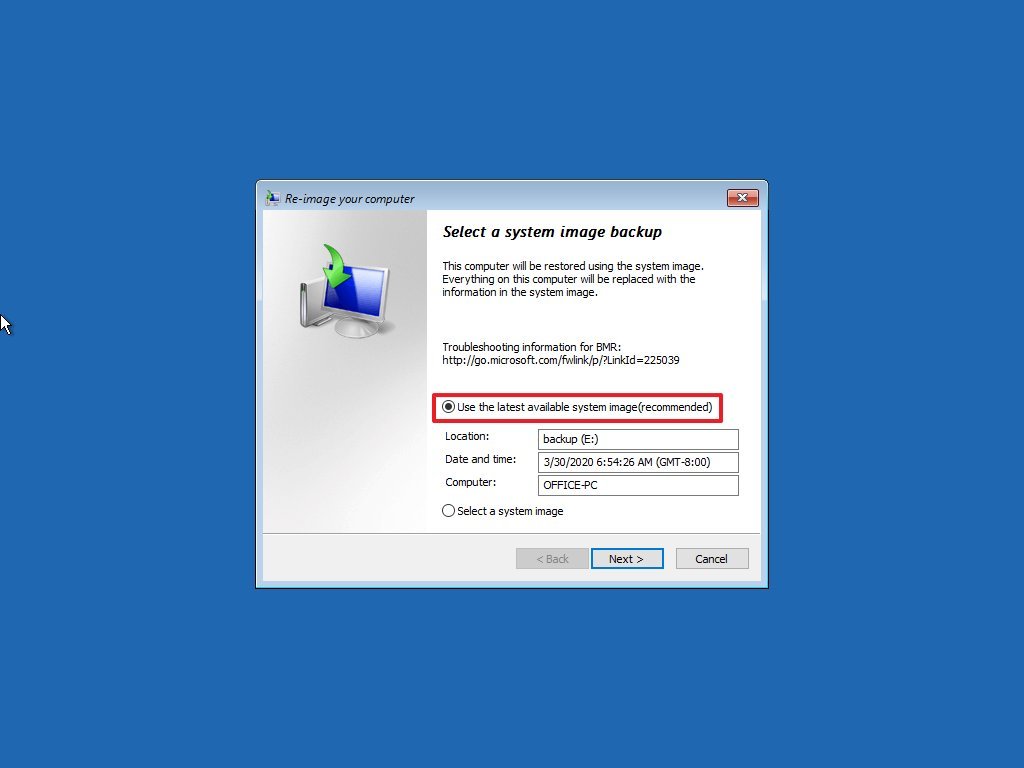
- Click the Side by side button.
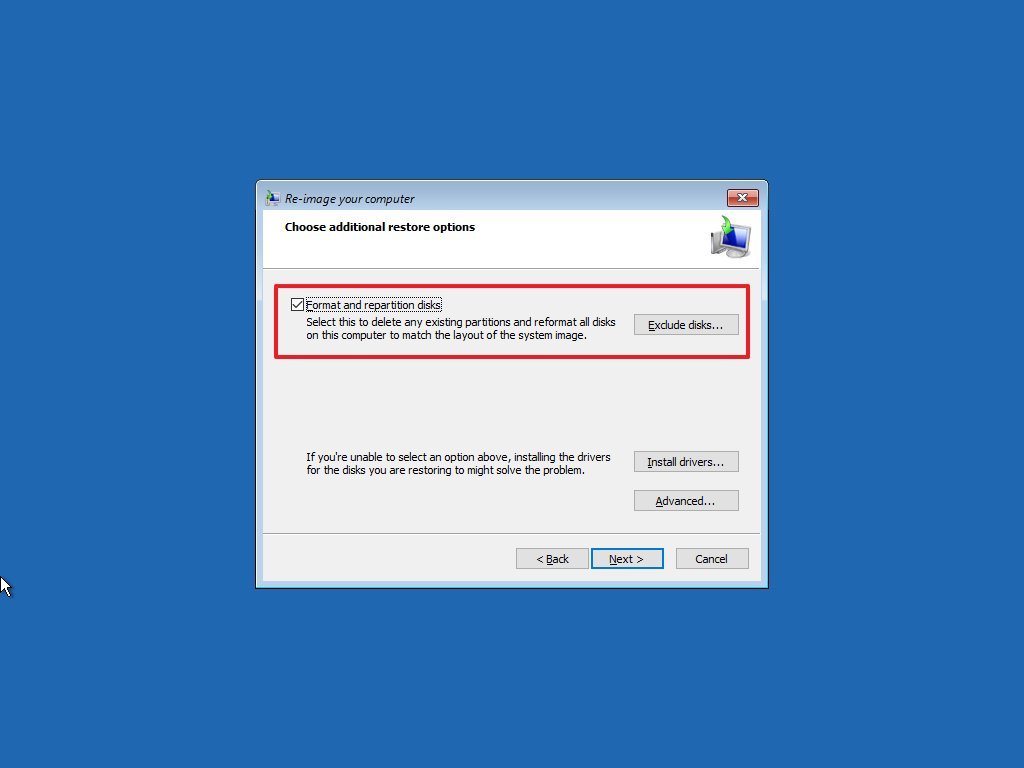
- Select the Format and repartition disks pick if y'all're restoring a full fill-in to your computer or replacing the hard drive.Of import: If yous have multiple drives with data that you don't want to erase, make sure to click the Exclude disks button to modify the settings to foreclose the process from wiping out those drives.
- Click the Next button.
- Click the Finish button.
- Click the Yeah push.
After you consummate the steps, the recovery process will outset, and information technology'll restore everything since the last backup. The completion time will depend upon the data and hardware configuration.
If yous piece of work with files frequently, and y'all don't create backups daily, it'southward recommended to complement the backup with some other kind of file backup. For example, using a OneDrive subscription allows you lot to keep a more than up-to-date re-create of all your personal files in the cloud.
Backup and Restore vs. system image fill-in
In addition to the Backup and Restore tool, you can also use the system prototype backup tool to create a full copy of your unabridged reckoner, simply there are a few central differences between these tools.
When using Backup and Restore, you can create automatic backups during a specified schedule, and you get more options. For example, you can configure the information that y'all want to protect, manage the storage, and yous can restore one or multiple files as well as the entire device.
However, this solution likewise has at least a couple of things to consider. When doing backups automatically, it means that the backup drive has to exist e'er connected to the computer, which could be a take a chance as if malware infects the device, it may also damage the backup.
In contrast, the system prototype backup feature allows y'all to create a full fill-in, but you must become through the process manually every time that you lot desire to protect your files and installation. Typically, this feature is more suited as a temporary backup when modifying the system settings or replacing the difficult drive.
1 significant benefit is that different the automatic pick, you lot can ever disconnect the backup bulldoze and shop it in a safe location, which can protect your data from malware and hackers as well every bit from natural disasters.
Similar to the automatic process, organisation prototype backup also has a few caveats. You can just restore files since the terminal time y'all ran the feature. As a result, if you're not proactive in creating backups, you lot could lose a lot of data during the restore process. Also, this feature is meant to restore your entire organisation, not private files.
We're focusing this guide on Windows 10, but the Backup and Restore tool has been around for a long time, which means you can refer to these instructions if you lot're using Windows 8.i and fifty-fifty Windows 7.
Source: https://www.windowscentral.com/how-backup-windows-10-automatically
Posted by: lewissatepas64.blogspot.com
0 Response to "How To Backup Computer Data Windows 10"
Post a Comment